Input Variables
Introduction
Input variables (sometimes referred to as filters) are a way of allowing the user to pre-assign values to variables that are used in random tables/generators. Anyone who has used online RPG generator tools will be familiar with completing html web form controls in order to generate a result.
A random table/generator with input variables essentially “prompts” the user for information in order to generate a result. It can be as simple as filling in the name of a character, creature or race, or get as complicated as prompting for weather and terrain, which may in turn result in complex creations.
The following video provides an overview of the Input Variables feature.
Types of User Inputs
From a user’s perspective, there are two means of entering input into a random table (or generator)
- Selection box (drop down) - For providing the user with a predefined list of items to select from
- Simple text input - For entering any type of text, such as names, locations, numbers etc.
Quick Example
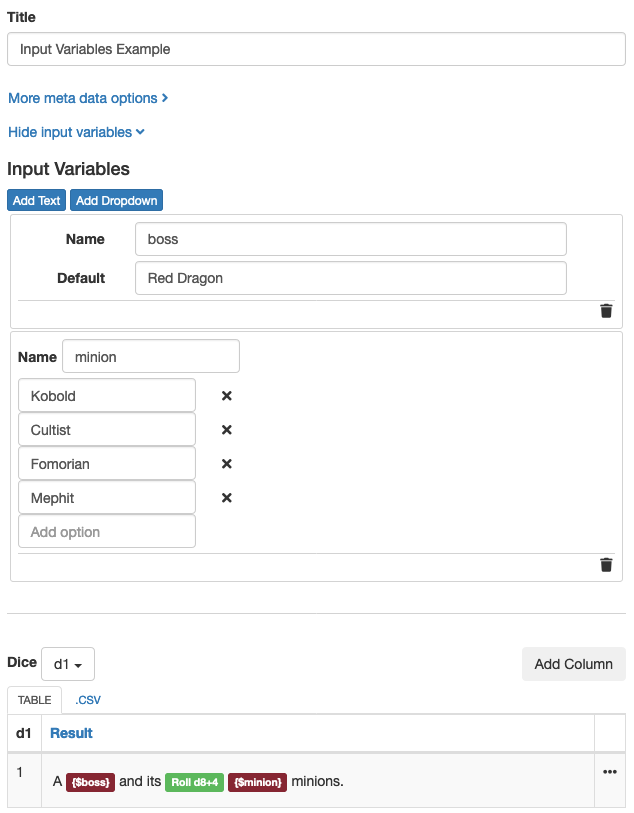
The above screenshot is from the chart editor page. Input variables can be set by revealing the hidden-by-default input variable section. Both a simple text input and selection box has been chosen. A the bottom of the screen shot, a simple d1 “generator-like” table will create a result based on these inputs. When a user rolls on this generator, they will be able to type in a completely different boss and/or select from a list of minions.
Example - code blocks
Variables in code blocks (recap)
In the variables section of the documentation, it is shown that variables can be created and assigned inside a random table using the following syntax
{% dragon = "Copper Dragon" %}
Code blocks don’t show up in the rolled result, but it does allow the variable (in this case, 'dragon') to be used during the roll resolution. For example, it can be displayed by using {$dragon}.
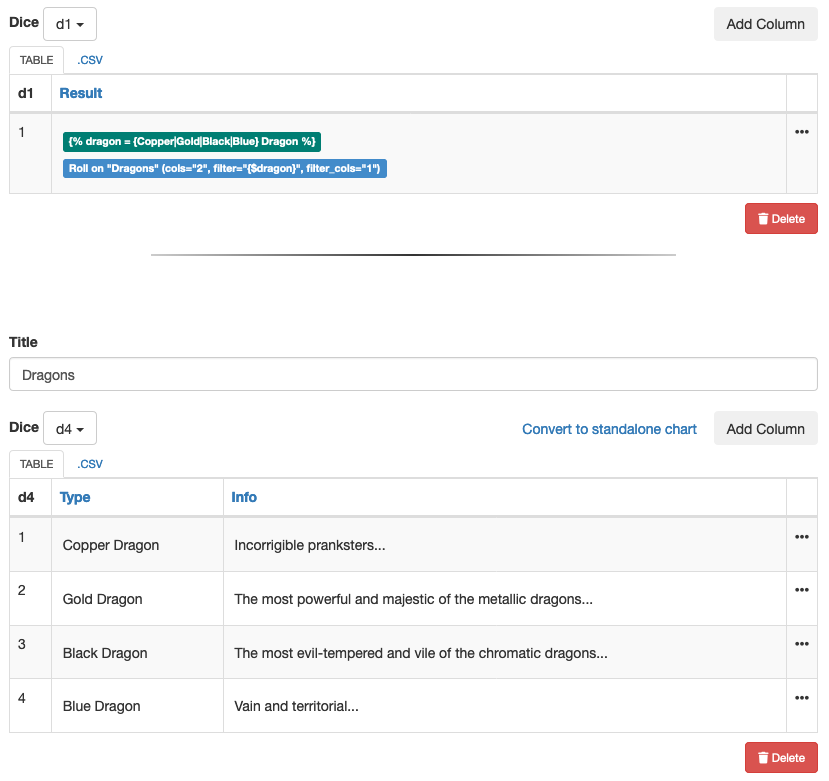
A more advanced example is to use filtering against other tables, replicating a conditional statement. For this example, imagine a “Dragon” chart with id=1234 that has two columns where the first column has creature names and the second column has more detailed data. By using the following syntax, information about a Copper Dragon would be returned.
{% dragon = "Copper Dragon" %}
{{roll_chart id:1234 filter:dragon filter_cols:"1" cols:"2"}}
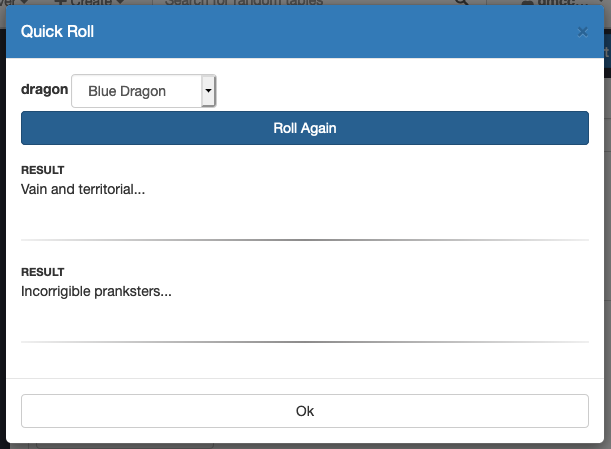
That would always return “Incorrigible pranksters…”, so expanding on this, the following can be used to get any of the four dragons listed in the table.
{% dragon = {{Copper|Gold|Black|Blue} Dragon} %}
{{roll_chart id:1234 filter:dragon filter_cols:"1" cols:"2"}}
Assignment using Input Variables
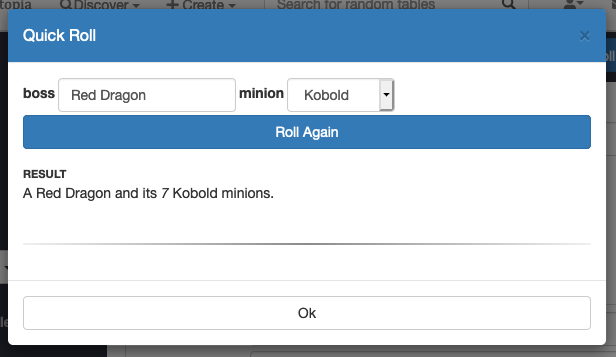
Input variables offer a flexible alternative to code blocks when it comes to assigning values to variables. In the above example, the user can either enter the name of the dragon using a text field, or select a creature from a predefined list that the chart’s author has created. The user’s selection will automatically assign the 'dragon' variable before the result is calculated.
This allows the user to select the dragon when rolling.
Default Values
One of Chartopia’s strengths is its quick roll buttons, so in order for this feature to work seamlessly, we recommend giving input variables a default value. An appropriate default means that any random table/generator using input variables doesn’t force user intervention in order to generate a result. Note that for a drop list, the first value in the list is the default.
Using Numbers
Chartopia doesn’t distinguish between strings and numbers, so if numeric values are required for a generator, both the text field and drop down can be used to allow the user to enter or select a number respectively. Numeric values assigned to variables can be used in equations.
If using code blocks, the following would render a result of 120.
{% x=100 %}
{{$x}+20}
If using input variables, a user could enter any numeric value they wished and have 20 added to it.
Language features as inputs
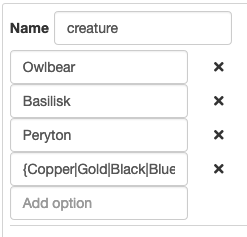
Input Variables are not limited to simple text and numbers; the entire Chartopia Domain Language feature set can be used. Anything from rollable lists to linked chart macros can be resolved first and then assigned to the variable.
For example, a list of creatures could be Owlbear, Basilisk, Peryton, {Copper|Gold|Black|Blue} Dragon, where there last options is a 25% chance of a different type of dragon.
For an even greater range of inputs, even macros can be used, e.g.
CHART(name=”Mega Creature Table”)
Further Example - Lookup tables
An alternative to if/else blocks or switch statements (which aren’t yet available in Chartopia), is to use subtables as key-value lookup tables.
A typical situation is to use the result of a random calculation as a lookup key for subsequent displayed information.
Code block variable assignment
As an example, in Chartopia there is a random table from the Stars Without Number (Free Edition) collection called System Points of Interest - Space Locations
The first column of the table is the ‘point of interest’ and the other two columns provide info on who or what occupies that point, and what the situation is there.
By using code blocks, it’s possible to randomly roll on the first column to receive a ‘point’ and then assign it to a variable. e.g.
{% point = CHART(id="6156", cols="1") %}
Then, the actual result is done by retrieving result only from rows that have $point as the value of the first column e.g.
CHART(id="6156", filter="{$point}", filter_cols="1")
Combine this with the ability to roll once per column and it’s possible to get 25 different possibilities for a single point location. Given there are 8 different point locations, that gives 200 variations to this random table/generator.
Input variables to select a location
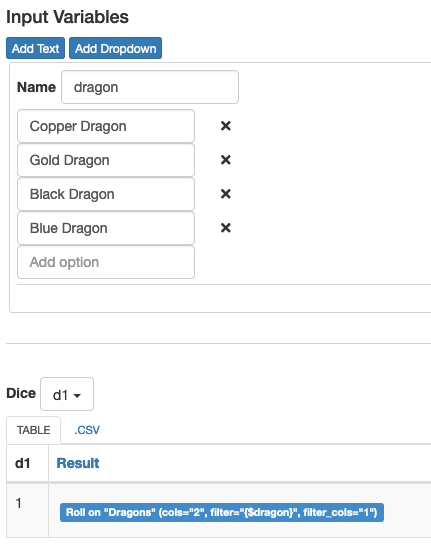
The natural extension to this is to provide the user a drop list so that they can select a location themselves. By adding a drop list input variable, all the locations can be added to that drop list and code block inside the generator-like d1 table can be removed.
Combining the two by using defaults
The first value of a drop list is the default, meaning when a user presses roll, the first value in the drop list will be assigned to the $point variable. This is a little restrictive though, because the advantage of the code block version is that it randomly selects a location/point.
This can be achieved by adding the code block’s expression (e.g. CHART(id="6156", cols="1")) to the first value in the drop box. As the default value, it will be automatically assigned to $point and then be used by the generator.
The user can now either let the generator work as the original, or choose to restrict the results to the location/point they want.
Input Variable Scope
A variable’s scope is the table row it’s declared in and all the linked tables that are called from that point. If a subsequent code block reassigns the variable, then that new value replaces it.
With input variables, the scope begins one step higher, meaning the variable is visible to the initial chart and then all linked charts it calls upon. Another subchart that has its own input variables will use their default values unless a calling chart has its own variable that overrides it.
This is an important distinction:
- Code blocks will re-assign new values to variables. This means all subsequent use of that variable, including usage inside subcharts, will use the new value.
- Linked charts that have input variables will use their default values unless a calling chart uses that exact same variable name. The parent/calling chart’s variable takes precedence over (and therefore override) input variables of linked charts. Note that if the linked charts uses a code block to re-assign the variable, the new value will then be used.